When Phase One first announced their flagship CMOS digital back, the IQ250 over 2 years ago, many photographers felt that the price point of $39,995 was way too much for a 50MP 1:3 cropped sensor back. This issue became even more inflamed when Hasselblad came out with the 50c later that year with a price tag in the $15,995 range, more than half the price of the IQ250. However both cameras shared the same sensor, the Sony 50MP CMOS chip for medium format cameras. Later on Pentax announced the 645z, and a third camera hit the market with the same Sony chip and it’s price was 8.4K. With the Pentax announcement and pressure from Hasselblad, Phase One made the decision to sell a “cheaper” version of the IQ250, and announced the IQ150 @ $34,995. For 5K less you did not get a 5 year value add warranty or wifi support. Also 1 year past, with the announcement of the Phase One XF camera body, IQ1 cameras did not receive the full support for all the new features the XF would offer. But Phase One did allow for Capture One support for the IQ150.
I first tried out the IQ150 in April of 2015. I was very tempted to purchase it with a trade it of my IQ260. However after giving it a lot of thought, I held on to the IQ260. The IQ150 would be a great fit for a XF or DF+ (both Phase One camera bodies). With the CMOS chip, you now have an excellent implementation of Live View so manual focus was much easier using the excellent IQ LCD. Use with a tech camera was not so positive as there was considerable color shifting past 10mm or so of shift. So I felt that using the IQ150 would allow for a easier route for software conversion, as now I could pick from Lightroom (LR) or Capture One (C1). However when I tried to open the IQ150 raw files IN LR, I received this screen.
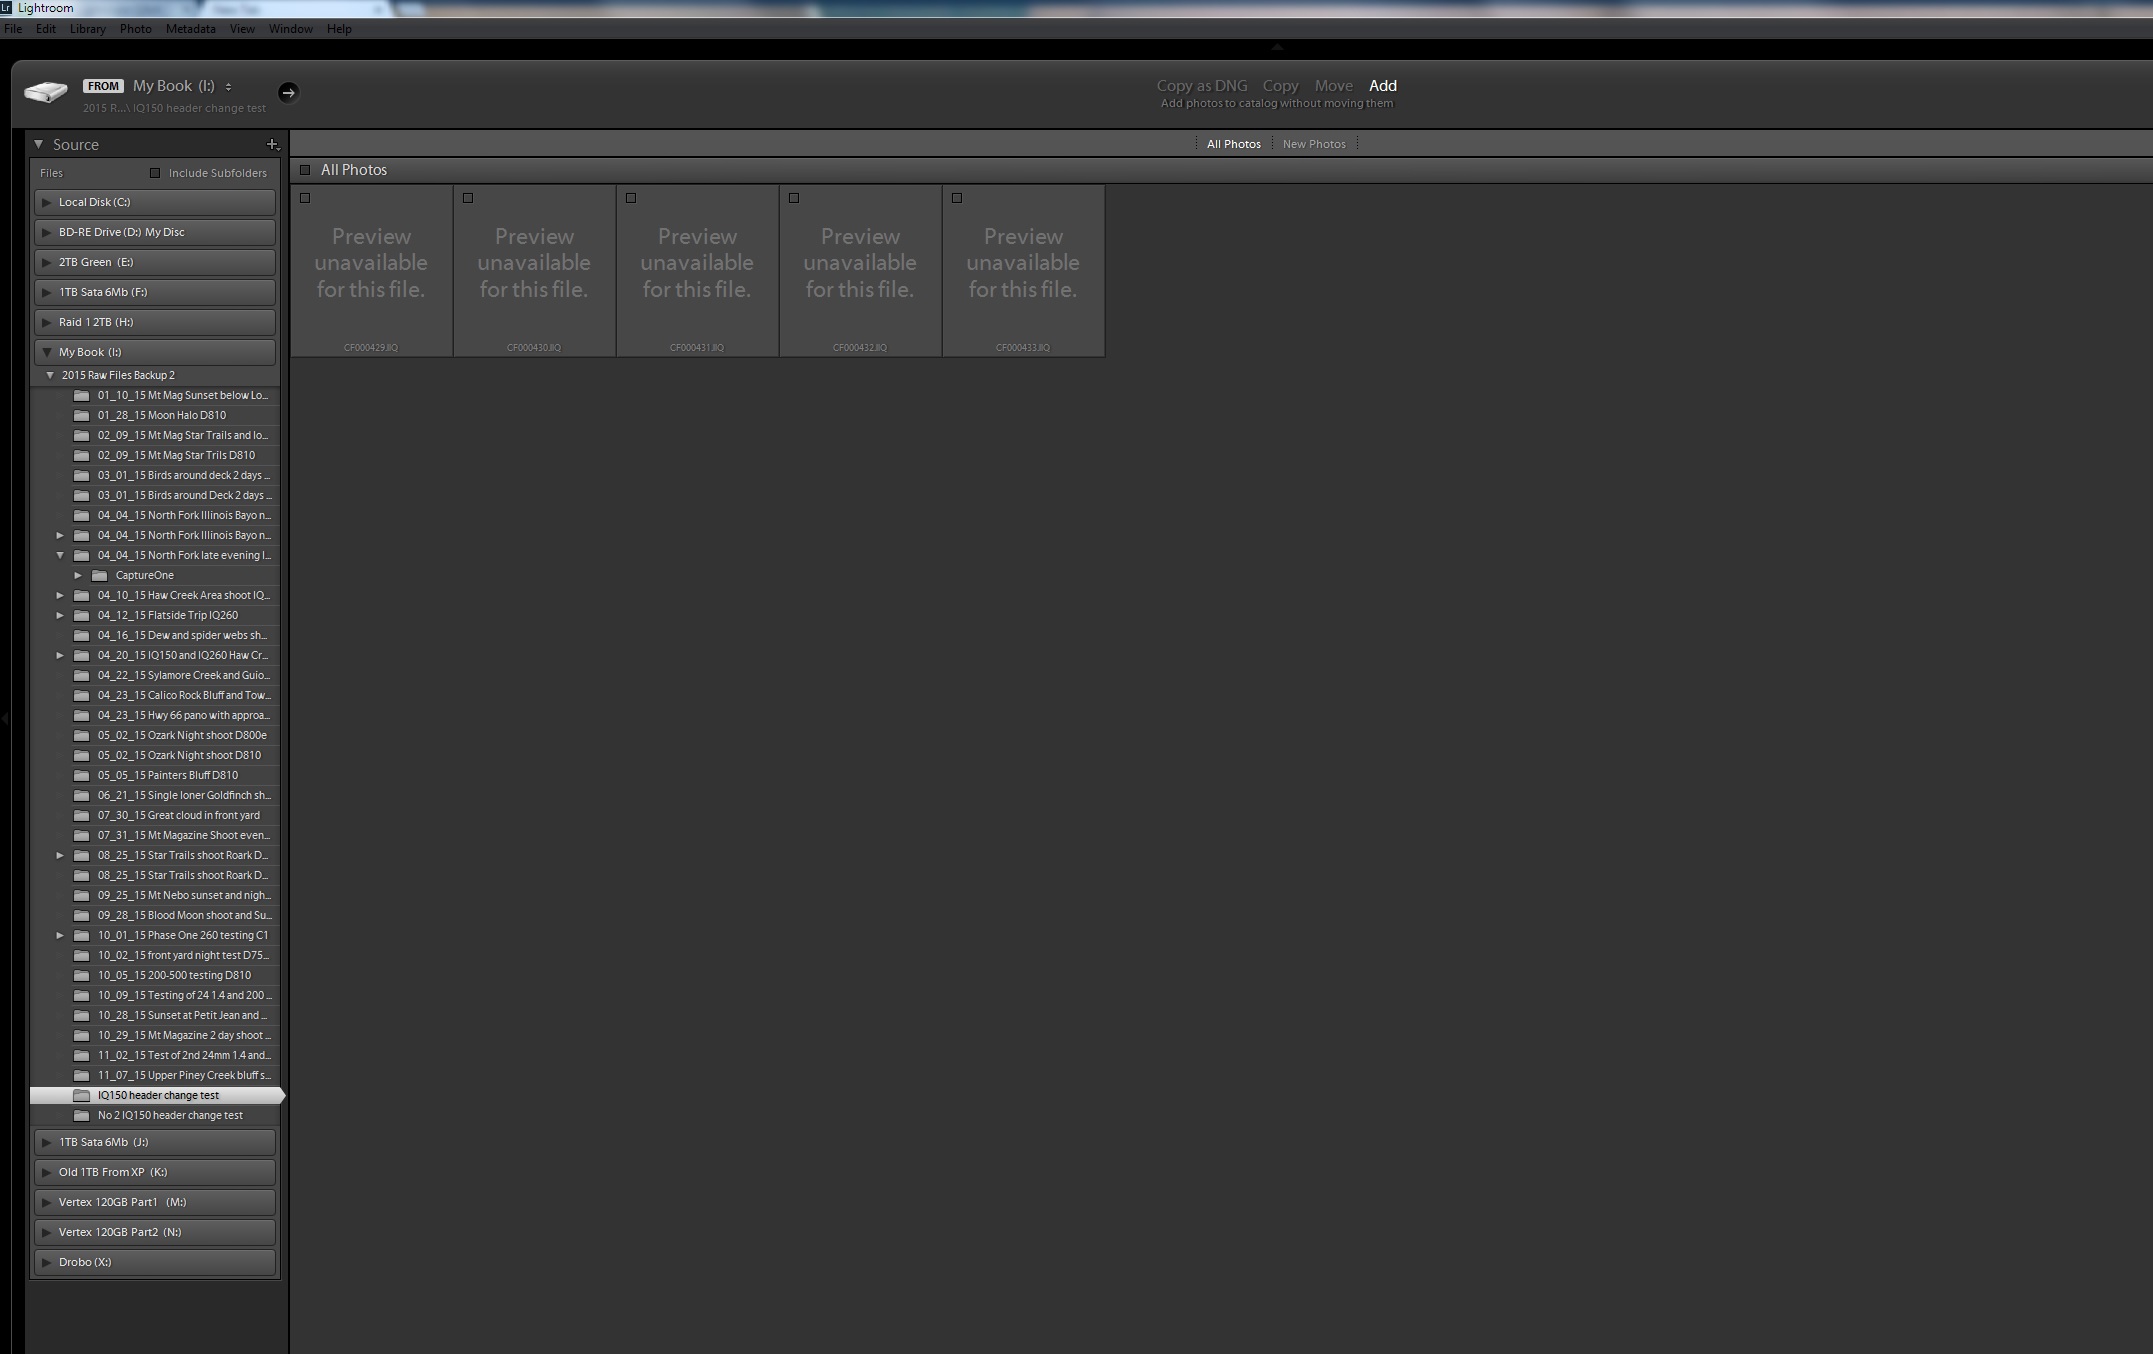
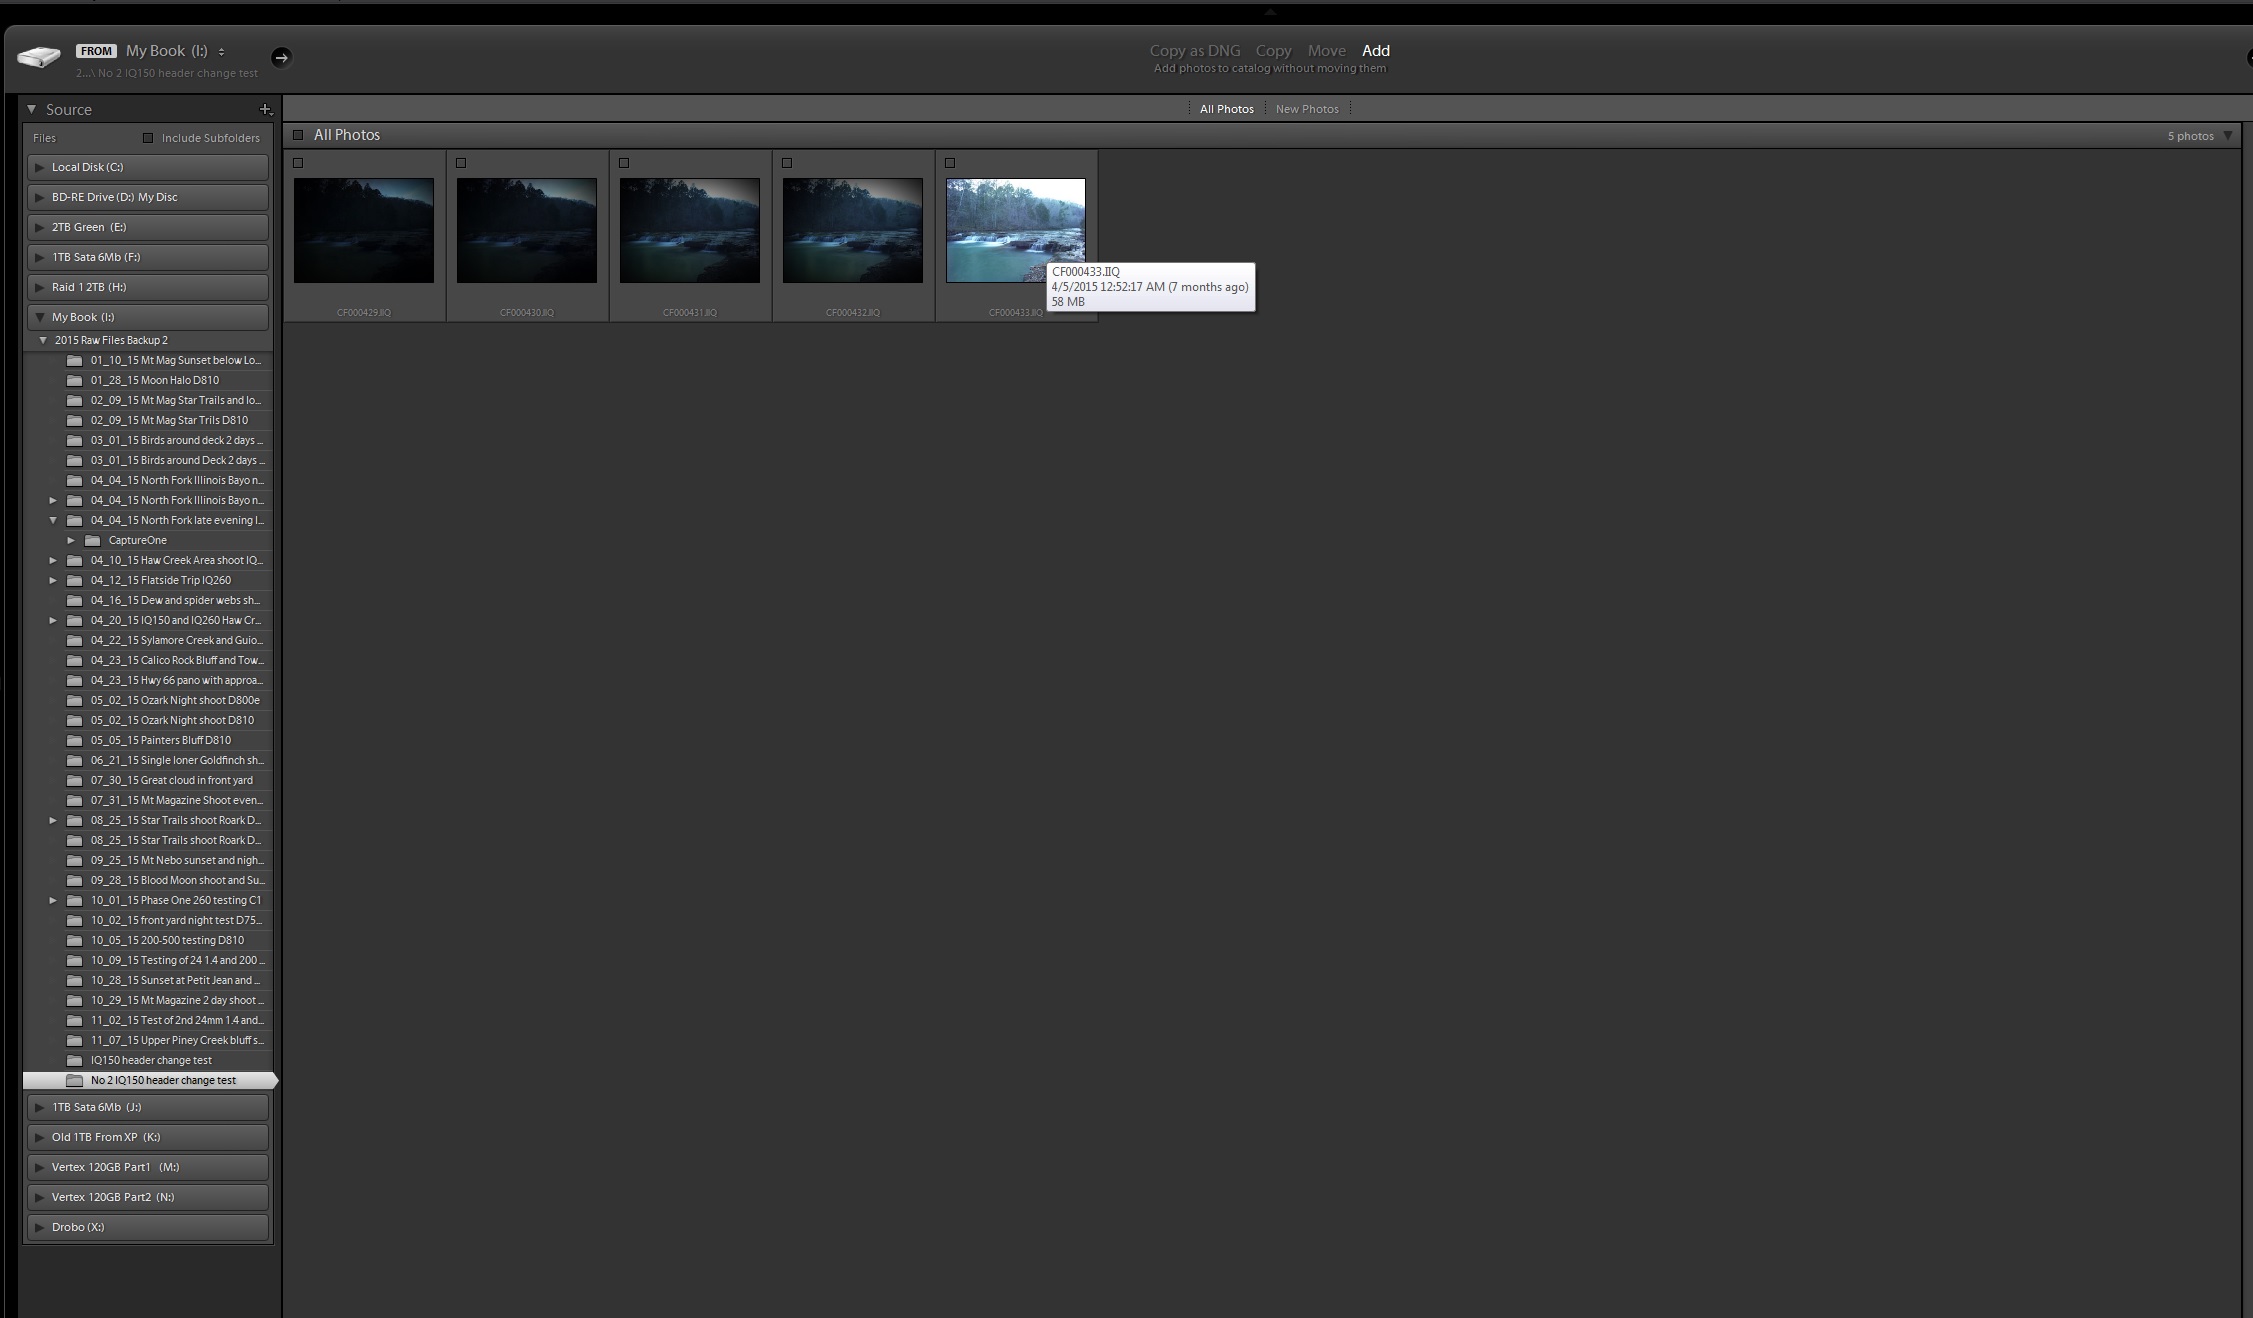
Screen shot of LR import for IQ150 files before exif change to IQ250
Basically, LR can’t see the files since they have a exif header of IQ150. LR had long ago picked up support for the IQ250, but back in April 2015 when I was testing the IQ150, I could only use Capture One. Sure Capture One should be the best software as it’s made by Phase One and the IQ150 is also. However there are times, more often than not, that LR due to it’s newer panorama and HDR tools may be a better fit. Both of these tools work better on raw files rather than imported tiffs. I naturally assumed that Adobe would pick up IQ150 support later on in a update to LR, however as of November 2015, you still can’t import the IQ150 raw files.
I have seen this issue before when new cameras first roll out as it takes sometime for the raw converters to catch up. However when I tried the IQ150 in April of 2015 it had already been announced for over 6 months so I was surprised then that LR did not support it. Now finding 6 months even further out, there is still no support I guess it’s safe to say, “Adobe plans not to support the IQ150″. I am not sure what that is all about as it’s a very simple change on their side.
The good news is that you can easily make one change to the exif information on the IQ150 file and LR will work fine and allow you to import the images. Just change the head from IQ150 to IQ250. It’s as simple as that. As the IQ150 and IQ250 share the exact same chip and CFA screen from Phase One, any profile from Adobe for the IQ250 will work fine with the IQ150, THEY ARE THE SAME CHIP 100%. So what is the best way to do this? You will need an exif editor software. These come in many types, some are command line other have a GUI interface. As I am not a programmer, I prefer GUI. So I found a neat little freeware program call ‘EXIFTOOL”. You can find it here:
When you go to the site search for the GUI part of the program. You have to have the base code loaded to your PC first then the GUI runs on top. Works great and will take care of stupid oversights like this one where Adobe overlooked the IQ150, or they don’t care about it.
The GUI will look like this when you open it: click on the image to view it larger.
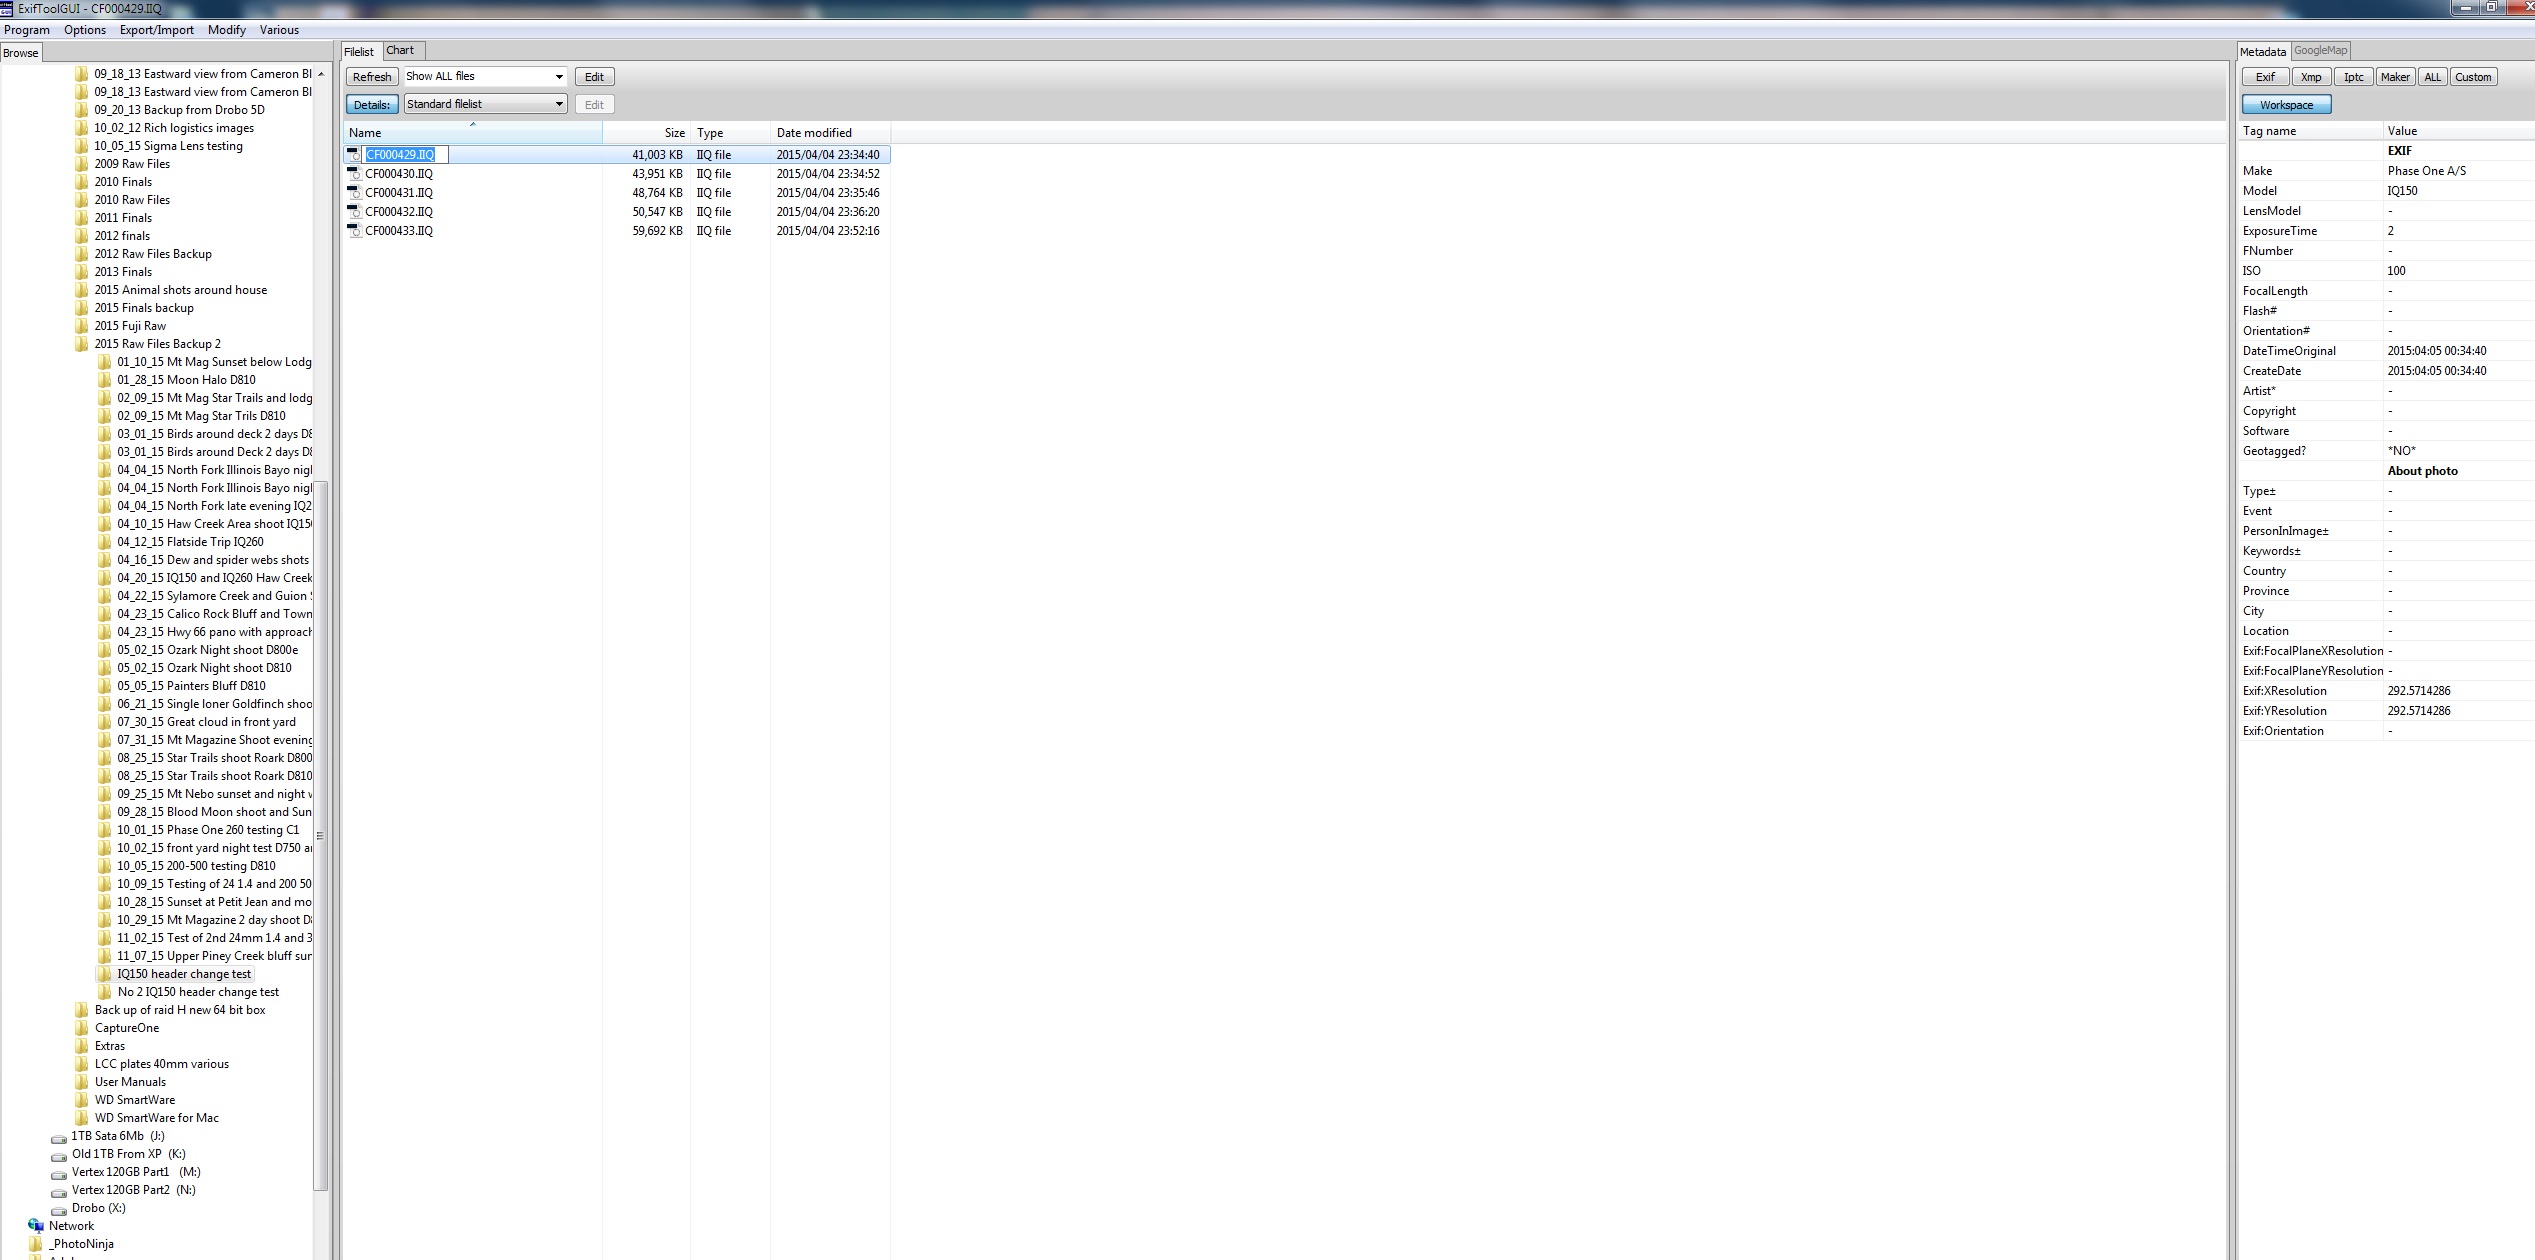
Part One using ExifTool
Notice you have the standard windows folder interface on the far left, and when you click on a folder the files in that folder will open up in the middle part of your screen. When you click on an individual file, the far right panel will open, will all the exif details for that particular file. Notice in the far right panel, that the “model” line lists this file as from an IQ150.
All you have to do is click on that line, the model line which then selects that item to be worked with. When you click on the model, it will load into the box at the bottom of the screen in the right hand panel.
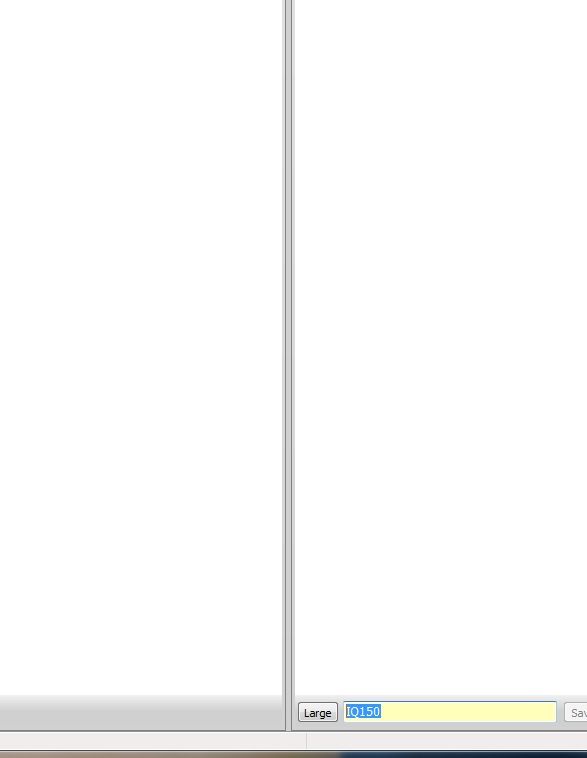
2nd Screen shot from ExifTool
Now just click on the IQ150, and change it to IQ250 and hit enter.
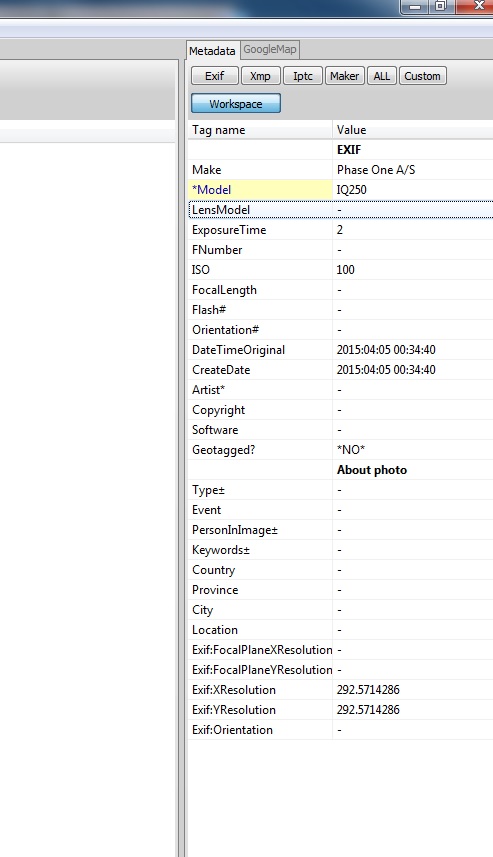
3rd Screen shot of ExifTool
Once you do this, notice “model” line has now changed to IQ250. All you have to do now is hit save and you are done. Exiftool will do the rest.
That’s all it takes, you don’t have to do anything else to the file. If you are good with command line coding, then you can drop a large number of IQ150 raw files into a folder and then run ExifTool on that folder. It will change just the model type for each image, if you can figure out the correct command line code structure. The only drawback to the Gui is that you can only select one image at a time. So if you have an IQ150 and are wishing to use it a lot with LR, then you might want to press Adobe to fix this issue with a update later on in both camera raw and LR.
Here is a screen shot from LR CC on the import screen. You can see that LR now has no problems reading the images. All it took was a SIMPLE HEADER CHANGE. Not sure what either Phase One would not want Adobe to make this change as there will always be someone out there that is not going to use Capture One. Since the issue has not been resolved now for over 1 year, I have to wonder what the acceptance rate of the IQ150 is inside the United States. It can’t be that large or there would have been a fix for this by now, as it’s not that big a deal to fix in the first place.
LR import dialog after the IQ250 header change
Maybe this will be fixed sometime in the future, but for now this will get you the support you need in LR. Also, don’t worry about this change for Capture One support. Capture One will just use the profile for the IQ250 on the IQ150 files and all is fine as they are the same exact chip. But more importantly they share the same CFA algorithm so all color profiles will work between the two with no problems. NOTE, this is not as true with the Credo 50. Here the CFA was developed by Leaf and there are some subtle differences in color profiles.


Recent Comments